Attendance and payroll
For: Owner, Admin, Cashier, Production, Courier
Clock in with a selfie, corrections, leave, approvals, and salaries paid by the owner.
Attendance records who works, who is late and who is on leave, and the owner pays salaries from the same app. Owners do not clock in.
For admins, cashiers, production staff and couriers who clock in; owners and admins who set it up and approve; the owner who pays salaries.
Steps to set up attendance
Open Attendance > Settings. Each branch shows its working hours, work days and clock-in radius, or No pin yet when its location is not set.
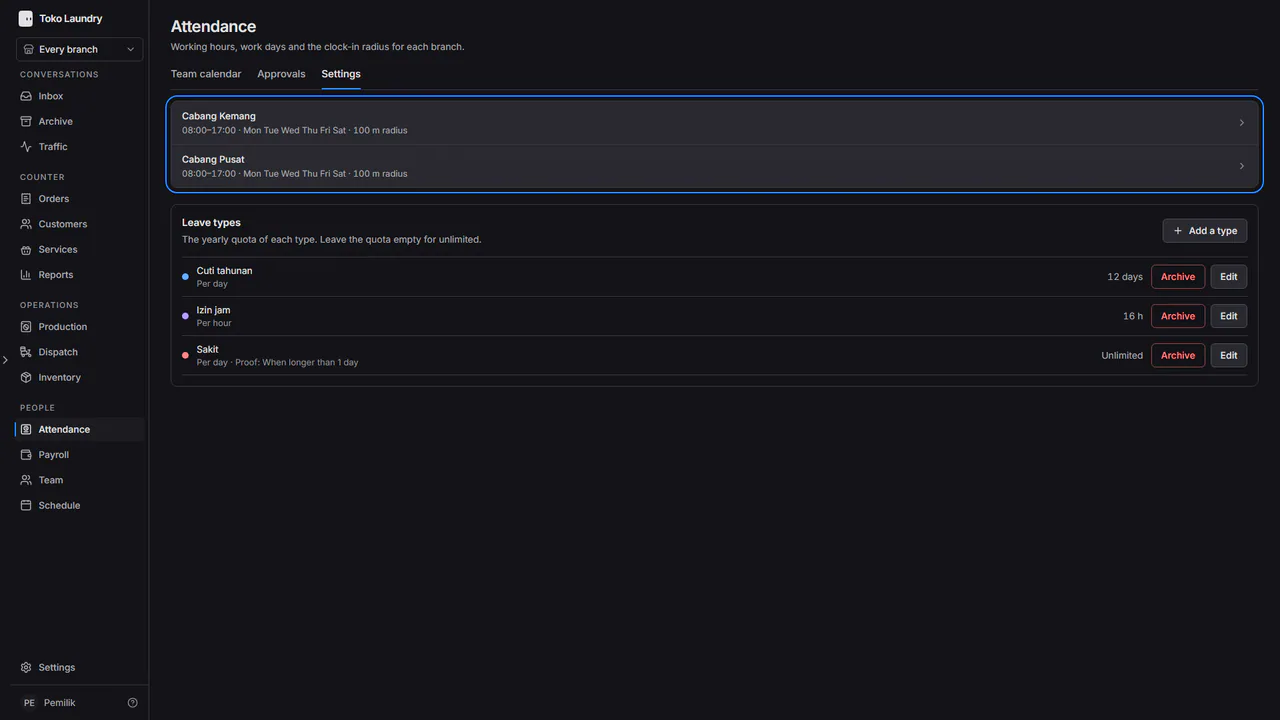
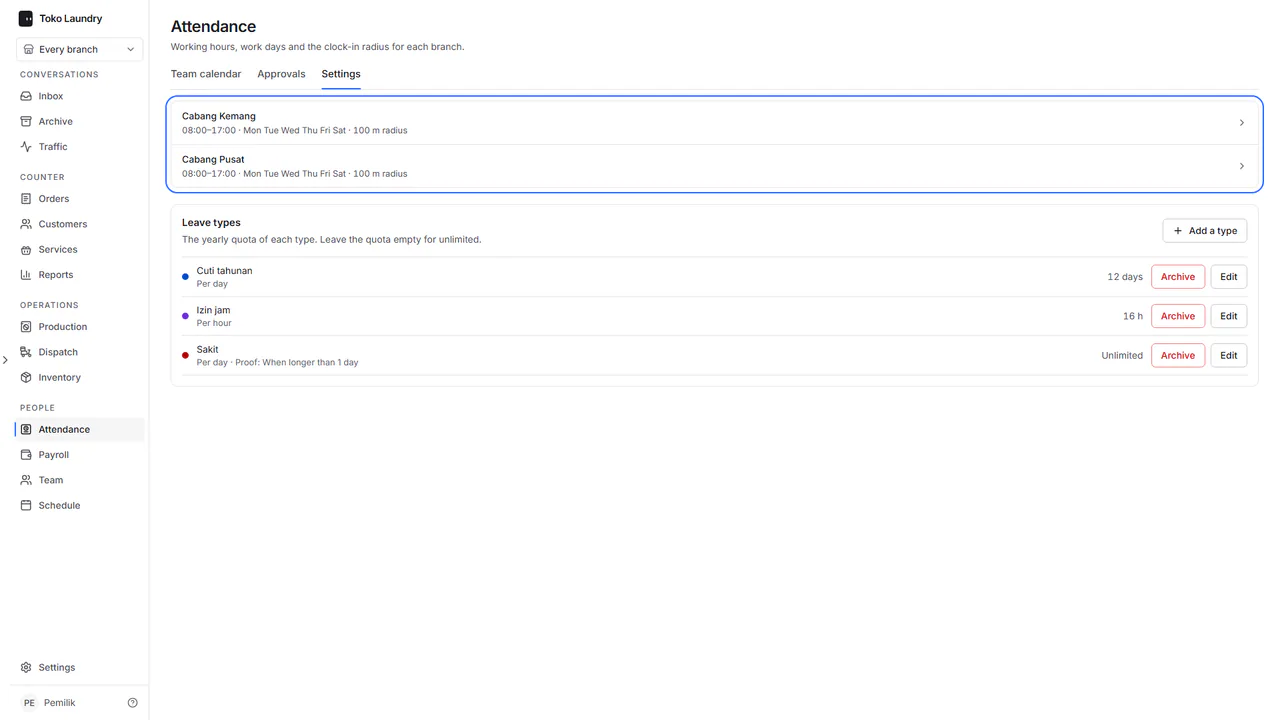
Pick a branch. In Work schedule, fill in Start time, End time and Work days. In Clock-in rules, fill in Late grace (0 to 120 minutes) and Clock-in radius (25 to 5,000 metres). In Branch location, drag the pin to the branch door, then press Save.
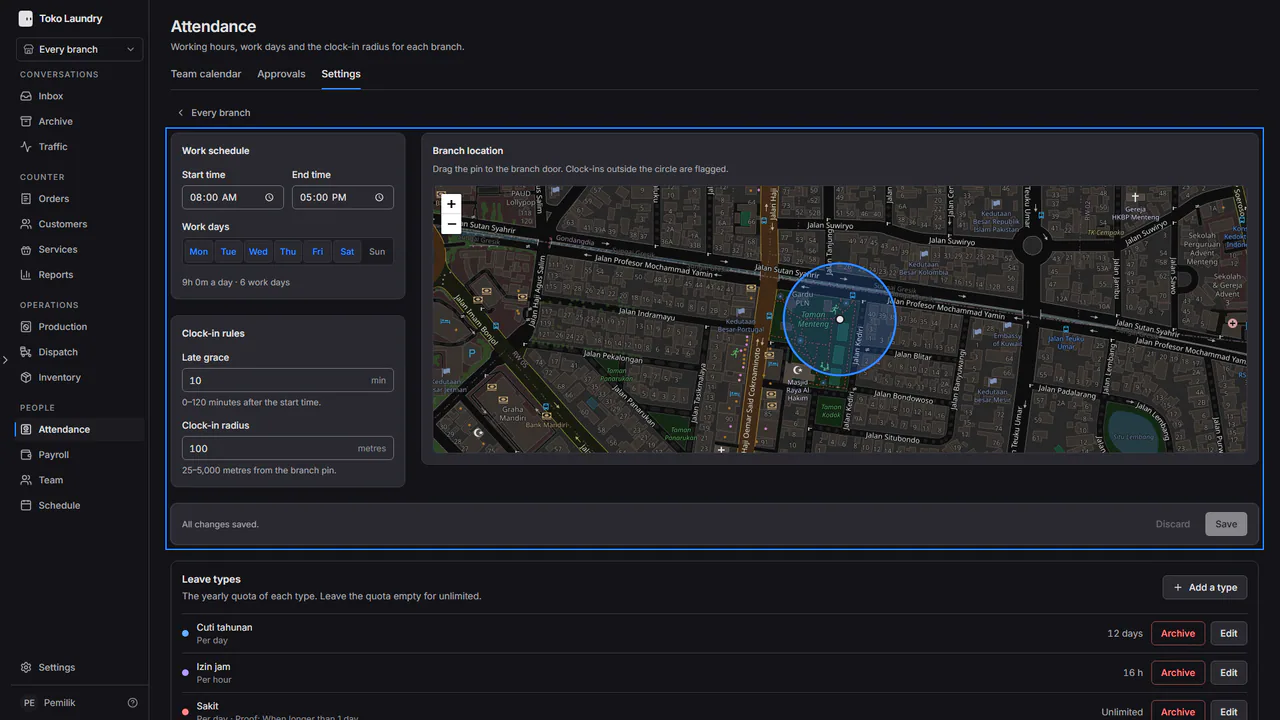
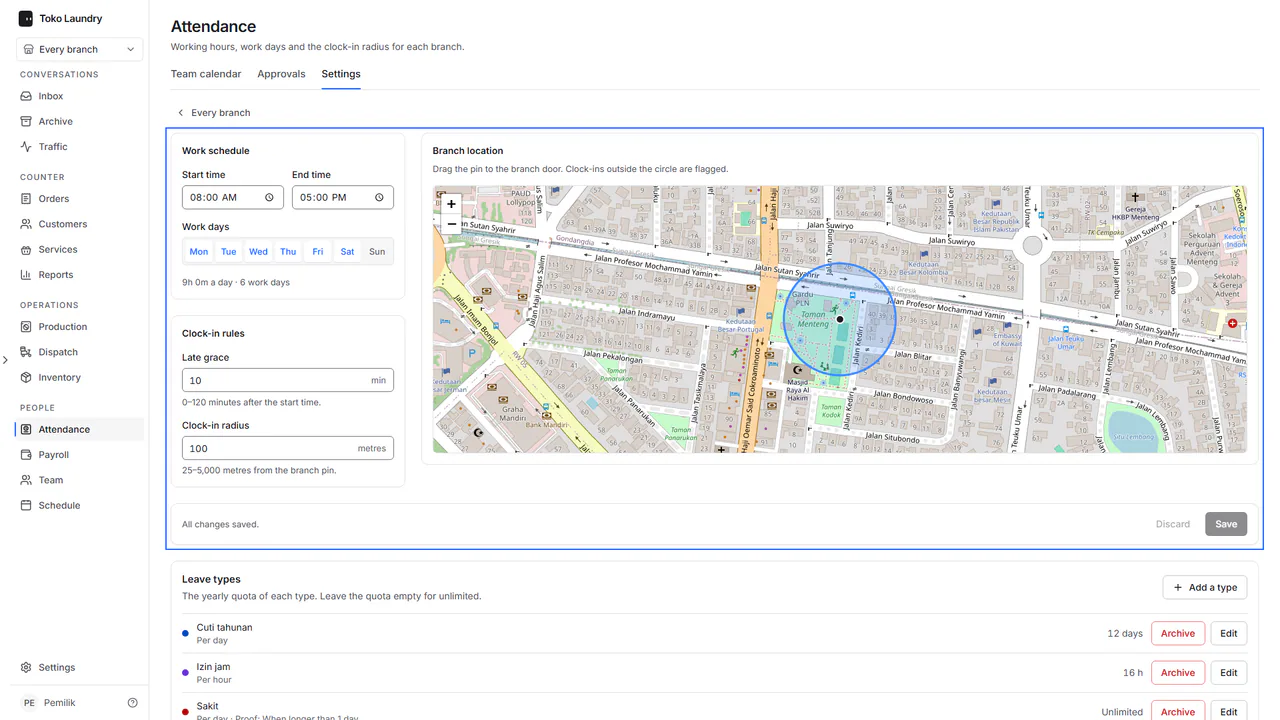
Without a pin, every clock-in at that branch is flagged for review, and the Clock screen says This branch is not pinned on the map yet, so all attendance is flagged for review. Under the branches, Leave types holds each type's yearly quota: Add a type, Edit or Archive.
Steps to clock in
Open Attendance, the Clock tab, then press Clock in. The first time, the browser asks for your location: allow it. Take a selfie, then press Confirm clock in.
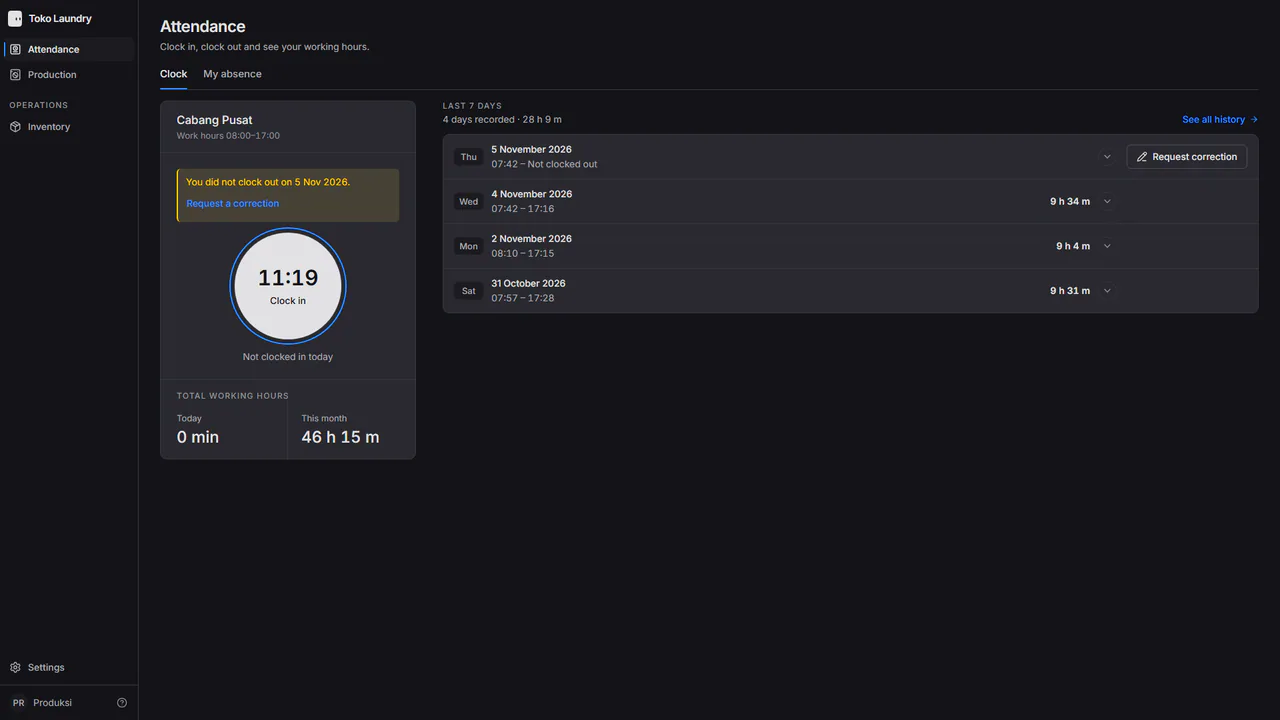
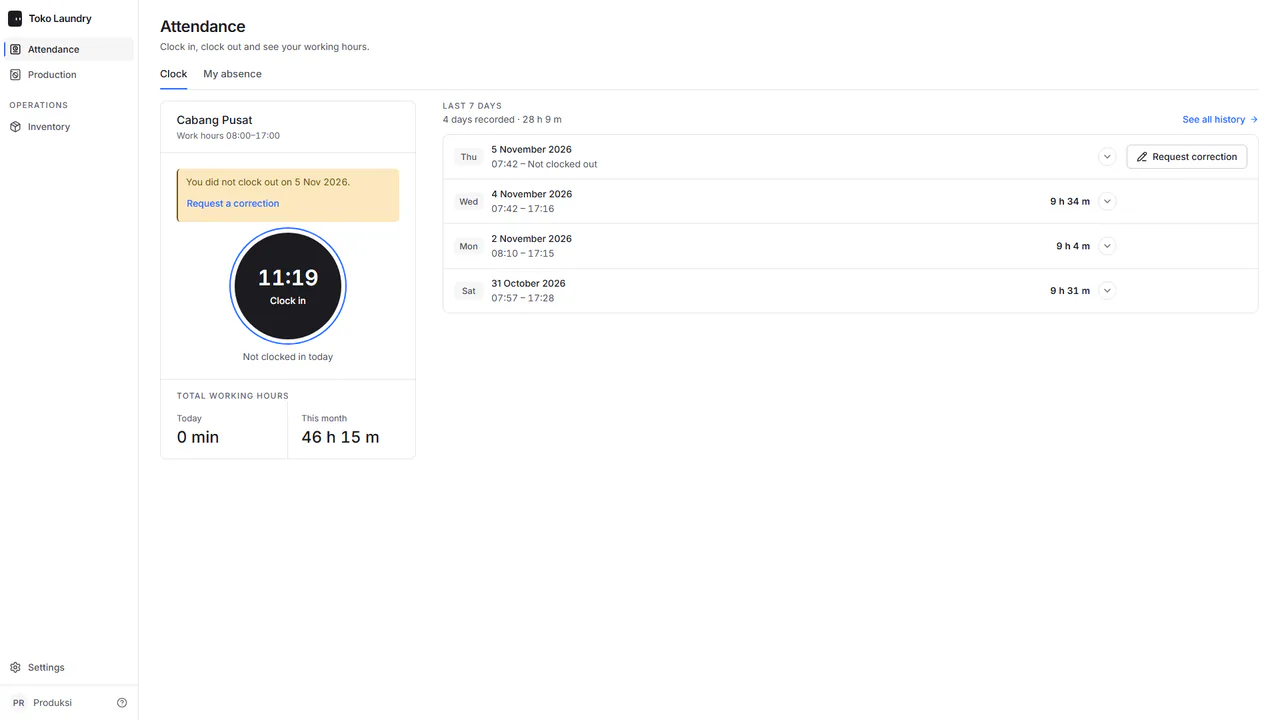
When you leave, press Clock out the same way. A clock-in outside the branch radius is still accepted and marked Outside the area. If location is refused, the screen says Location permission was denied. Turn location on so your attendance is not flagged.
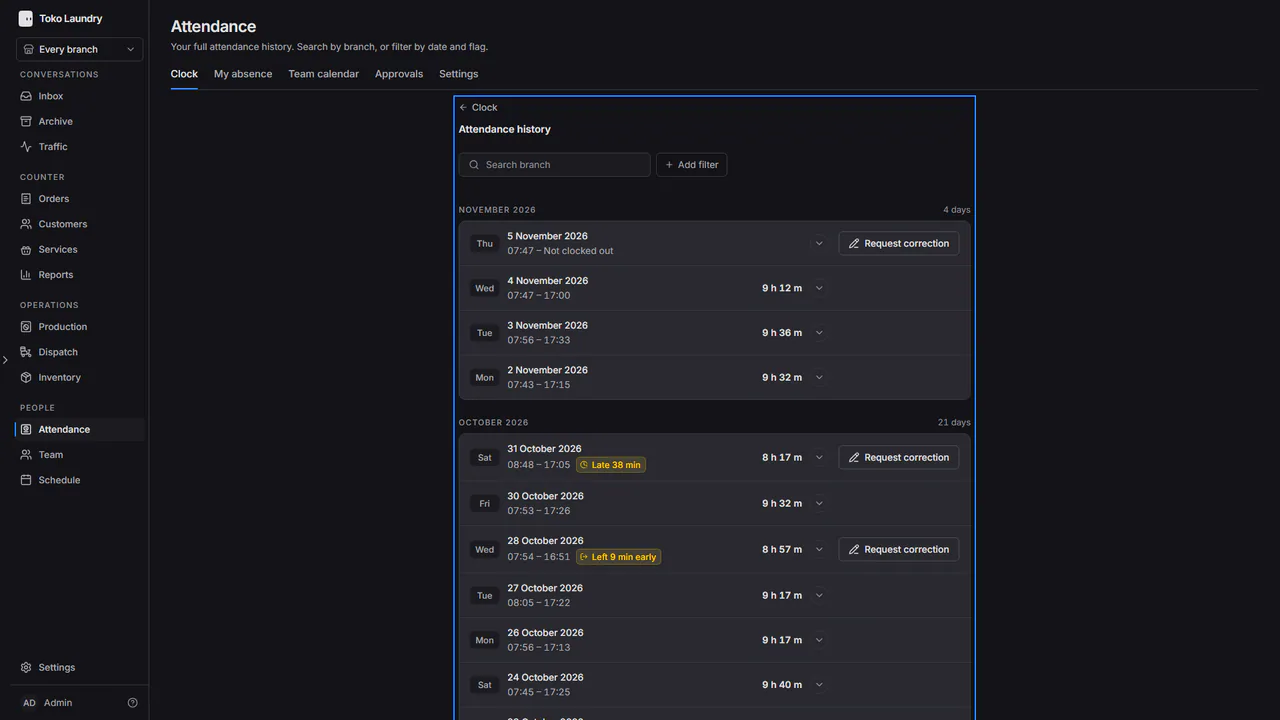
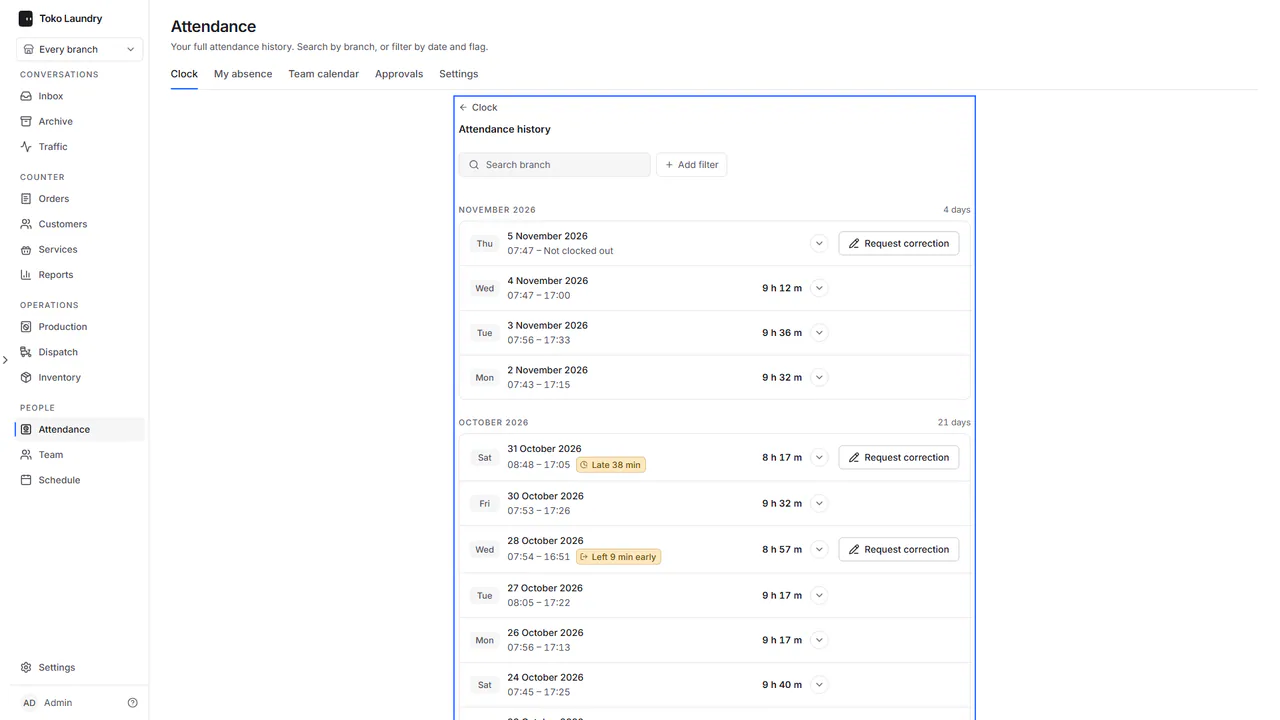
If a day is wrong, press Request correction on that day's row. Fill in Clock-in time, Clock-out time and Reason, then press Send correction.
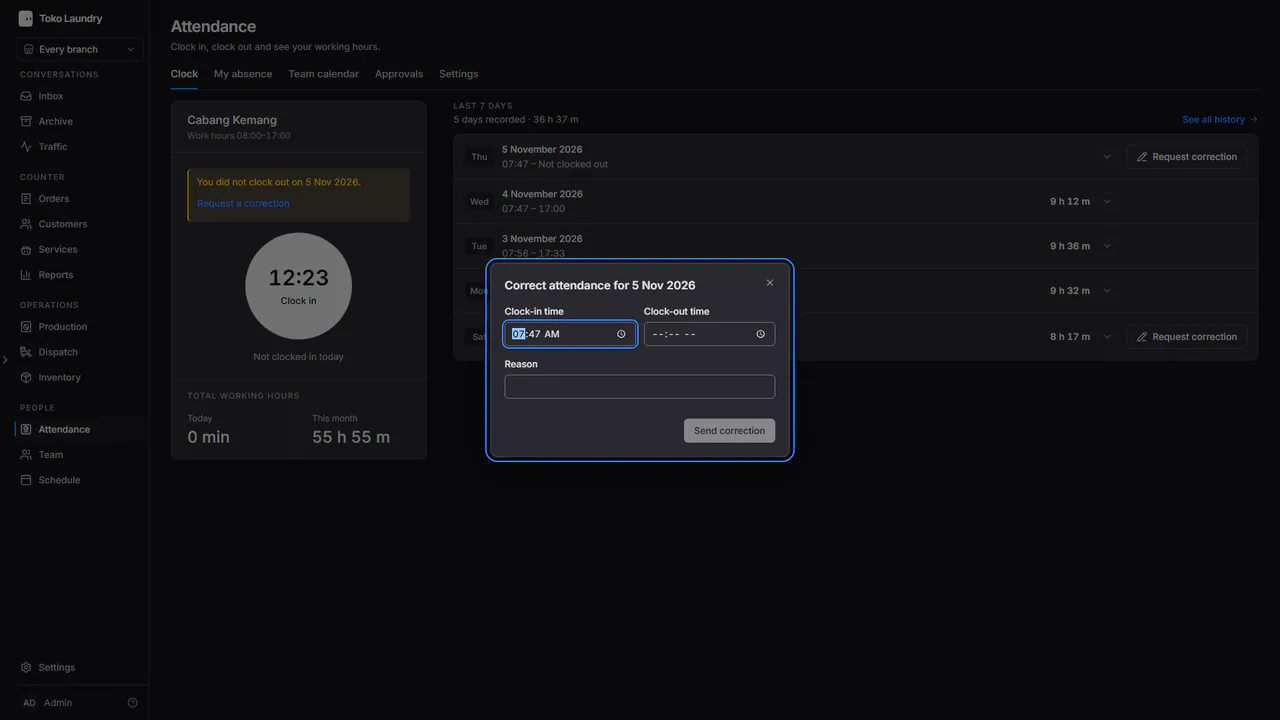
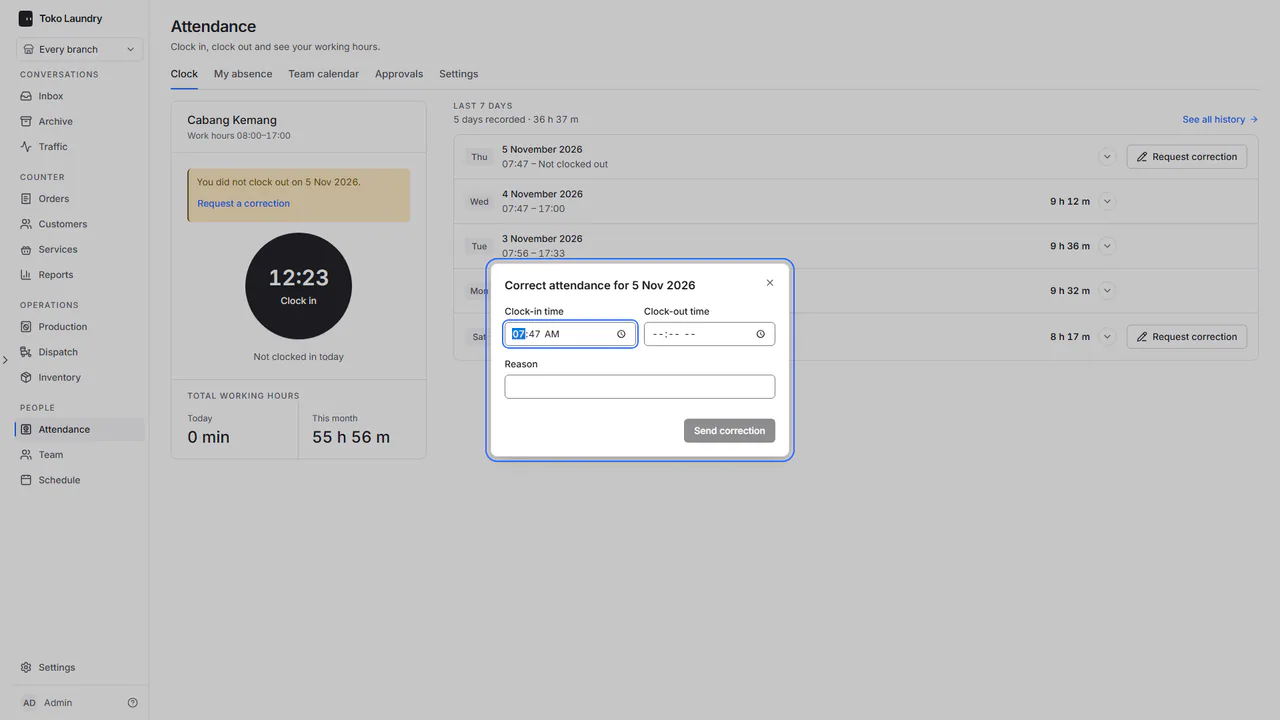
For older days, press See all history. Attendance history lists all your clock-ins by month; search by branch, or press Add filter for dates and flags such as Late or Left early.
Steps to request leave
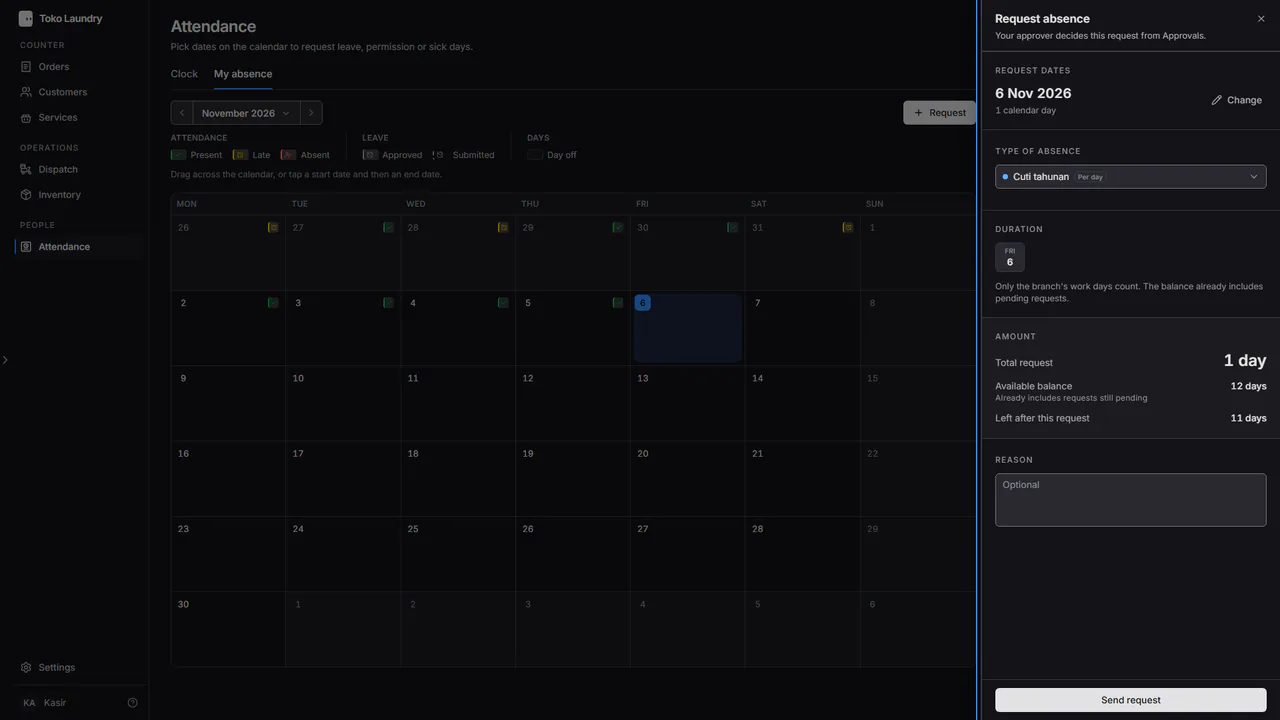
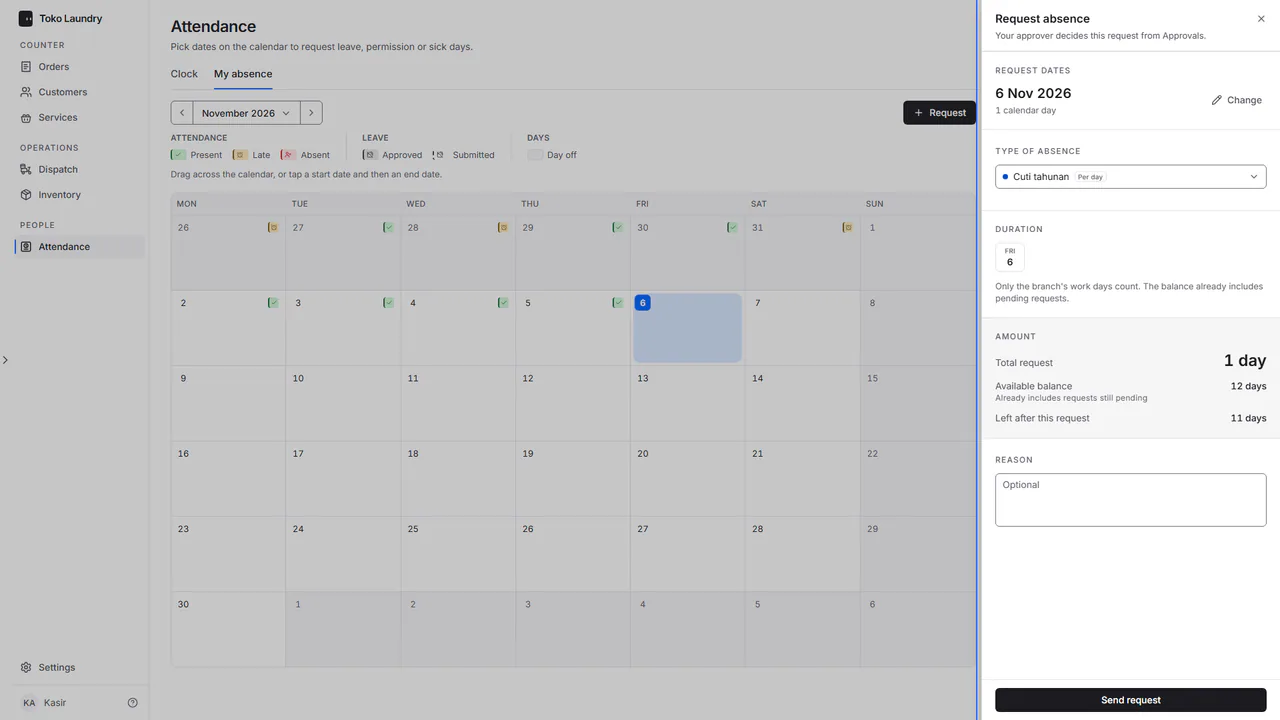
Open the My absence tab and pick dates in the calendar, or press Request.
Pick the Type of absence, write a reason if needed, then press Send request. The sheet shows Available balance and Left after this request.
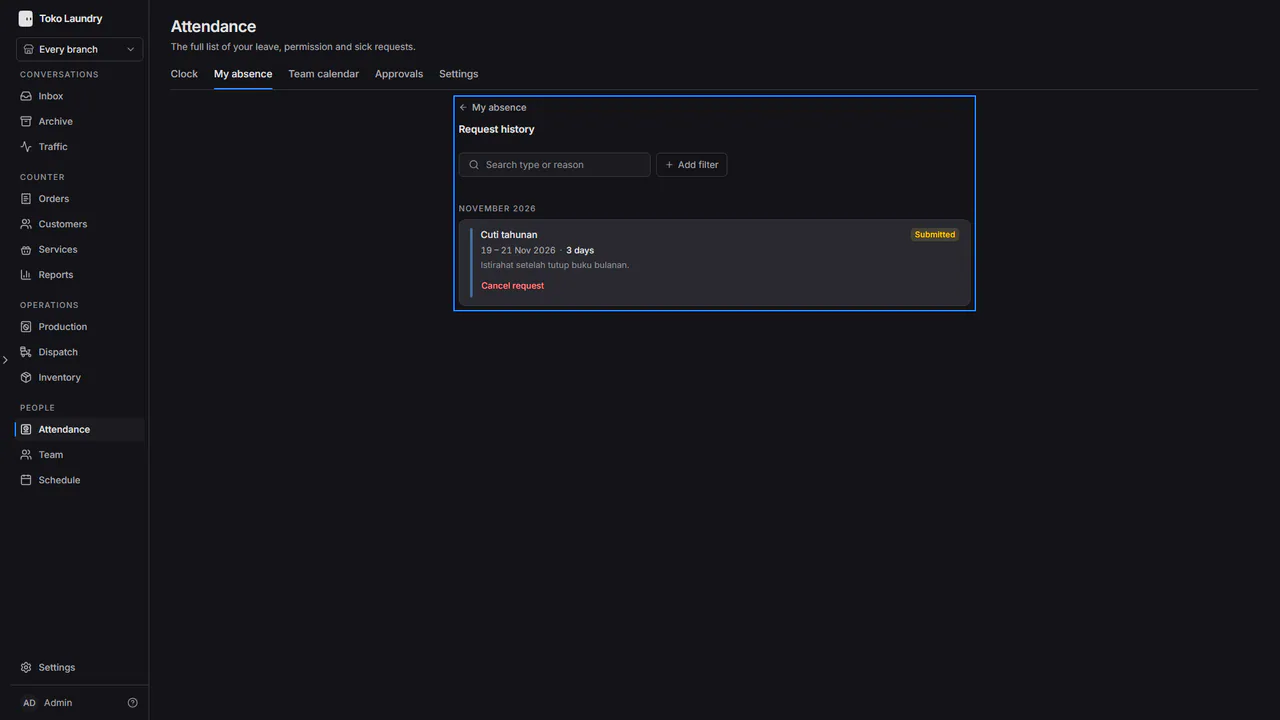
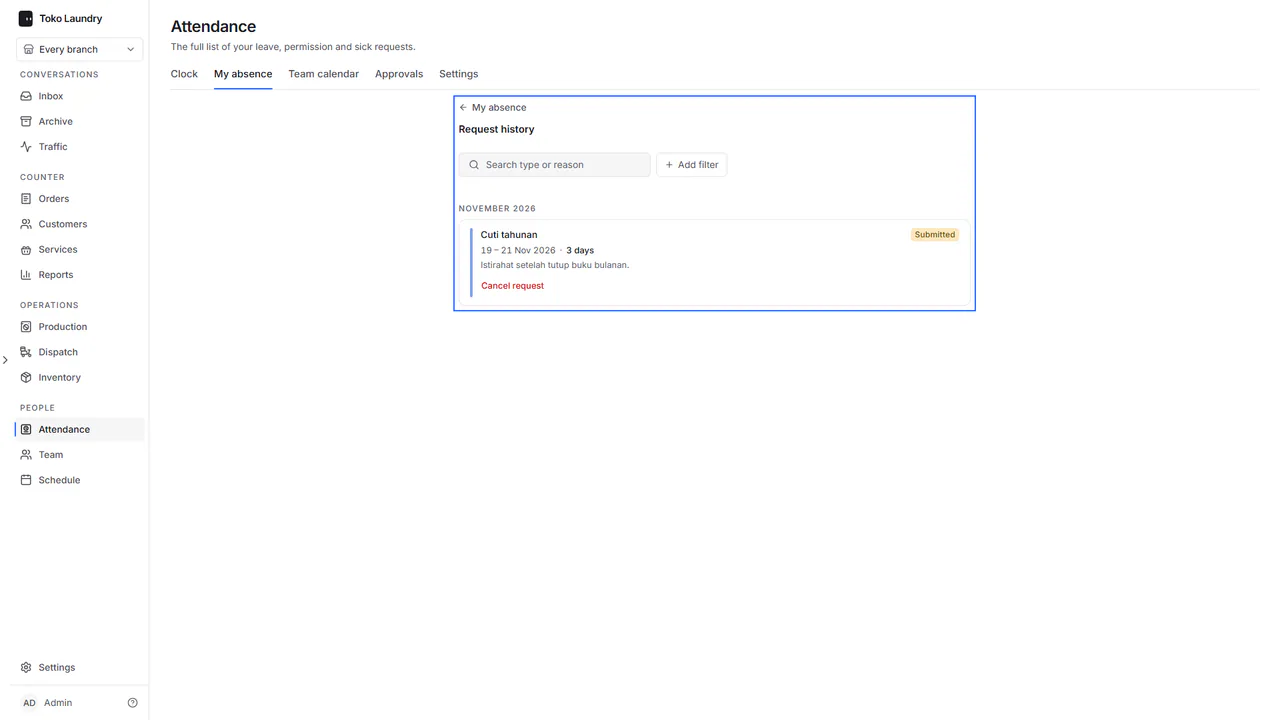
Press View all requests for Request history. A request still waiting can be withdrawn with Cancel request.
Steps to approve
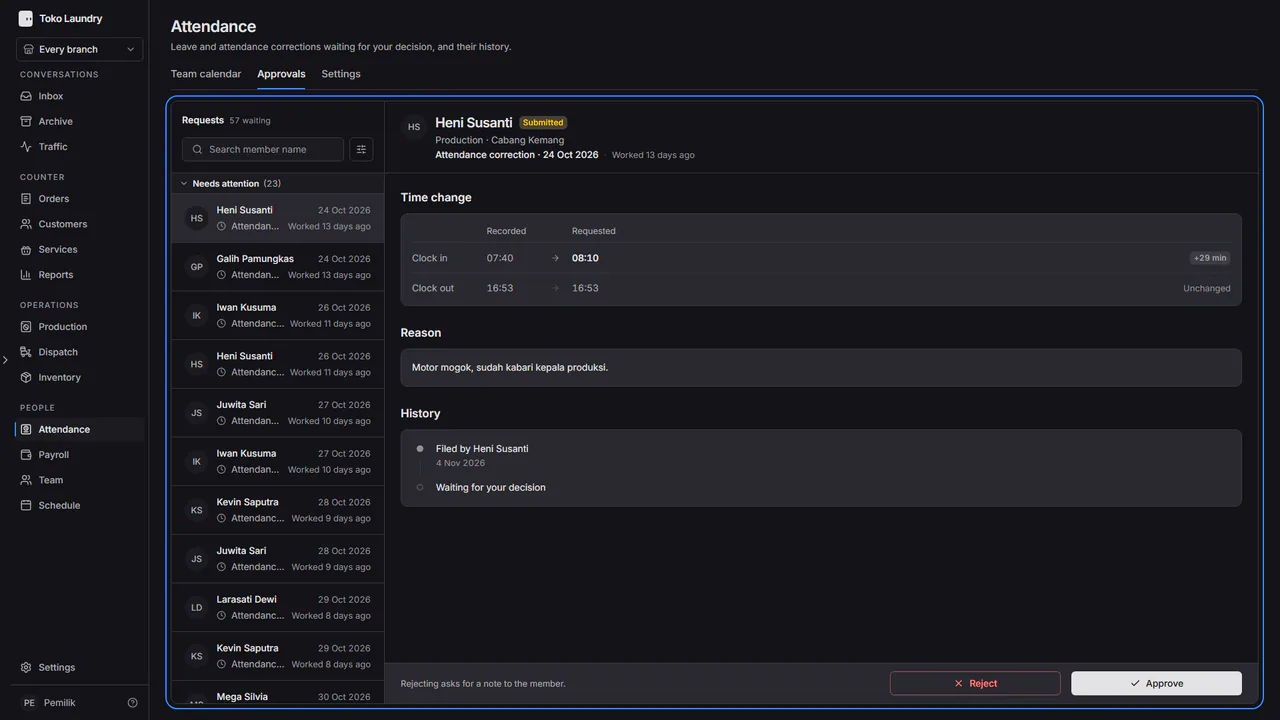
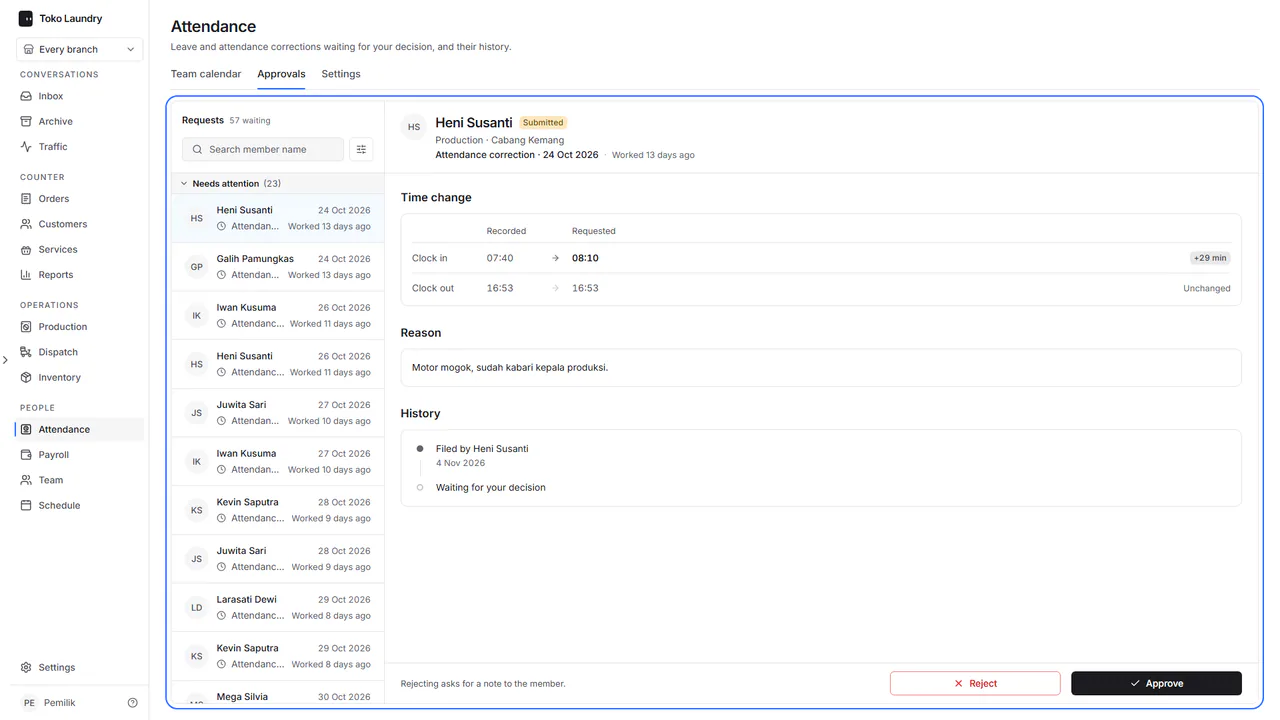
Open the Approvals tab and pick a request. The right panel shows the change asked for, the reason and its history.
Press Approve, or Reject with a note.
An admin decides requests in their branches but never their own. An admin's requests are decided by the owner.
Steps to read the team calendar
Open the Team calendar tab. Pick the month at the top. The boxes below count Present, Late, On leave and Not in yet for today, and each member has one row with a mark per day.
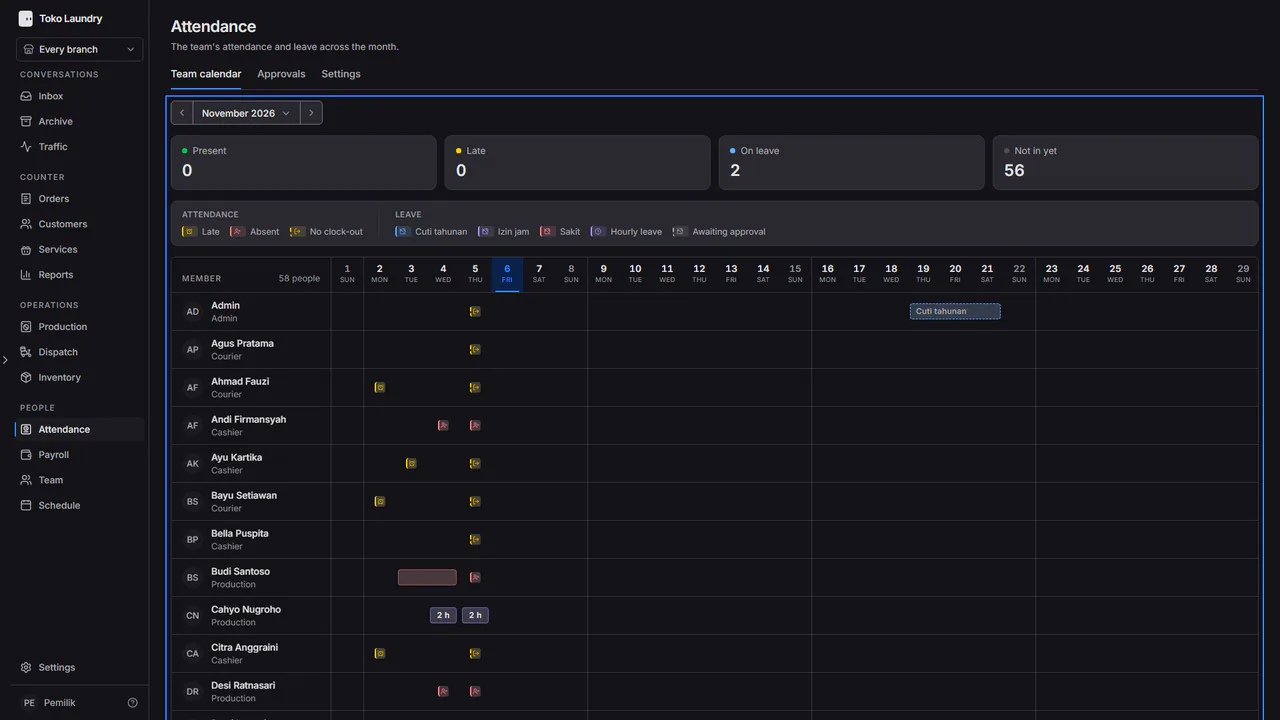
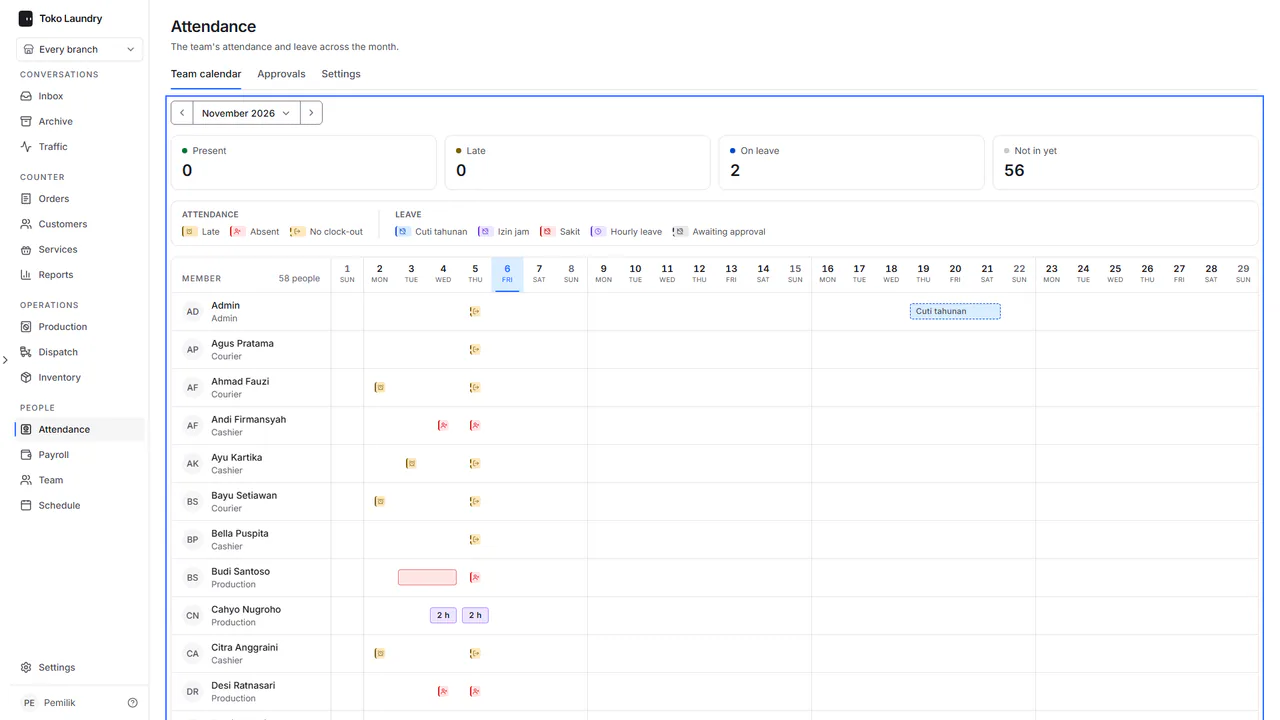
Press a mark on a day to see that member's clock-in, clock-out, attendance photo and leave.
Steps to pay salaries
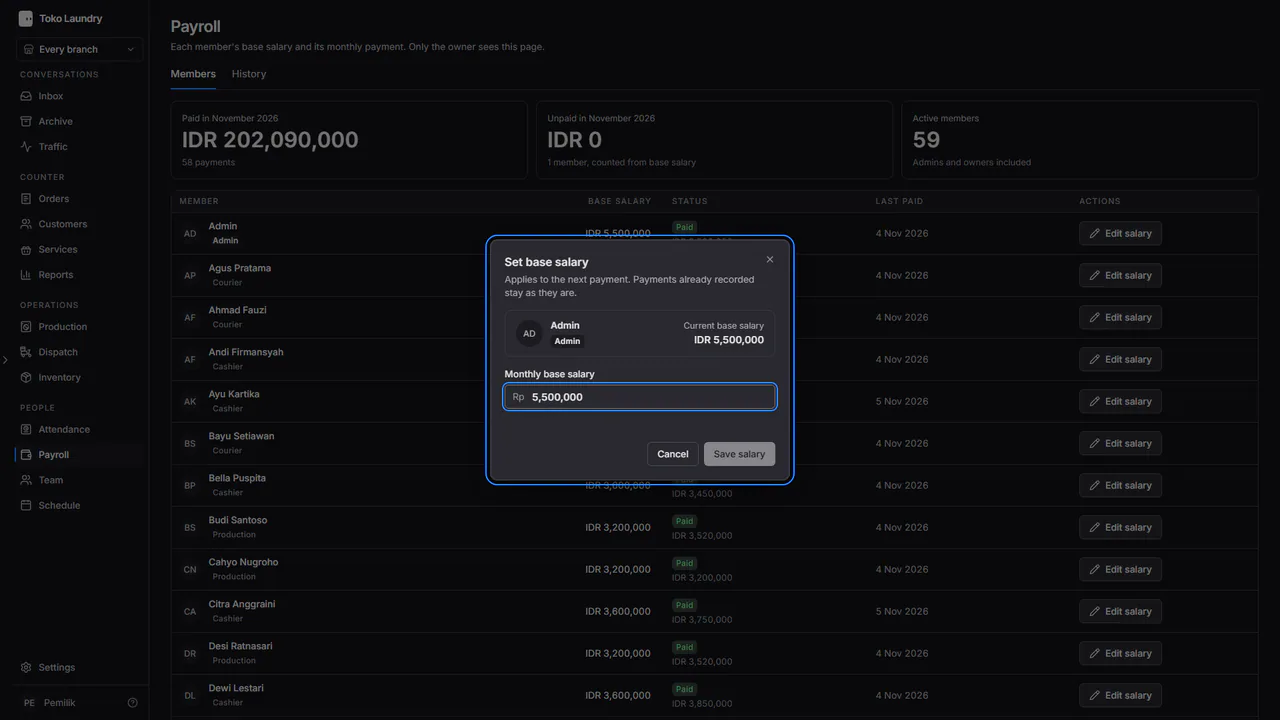
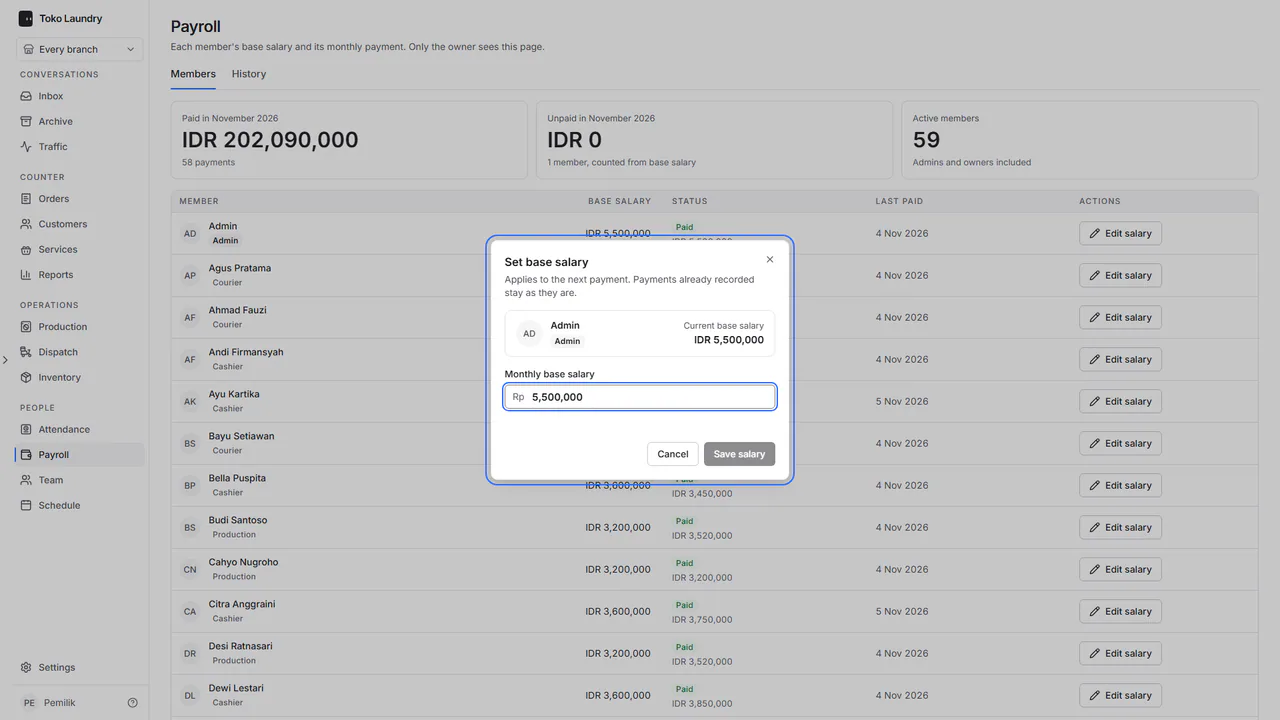
Open Payroll. On the Members tab, press Set salary for a member with no base salary yet, or Edit salary for one who has it. Fill in Monthly base salary, then press Save salary.
Press Pay on a member not yet paid this month. Fill in Bonus, Deduction, Method and Payment date, then press Record payment. A member is paid once a month.
Open the History tab to see every payment. A wrong payment is voided with Void and a reason, then that month can be paid again.
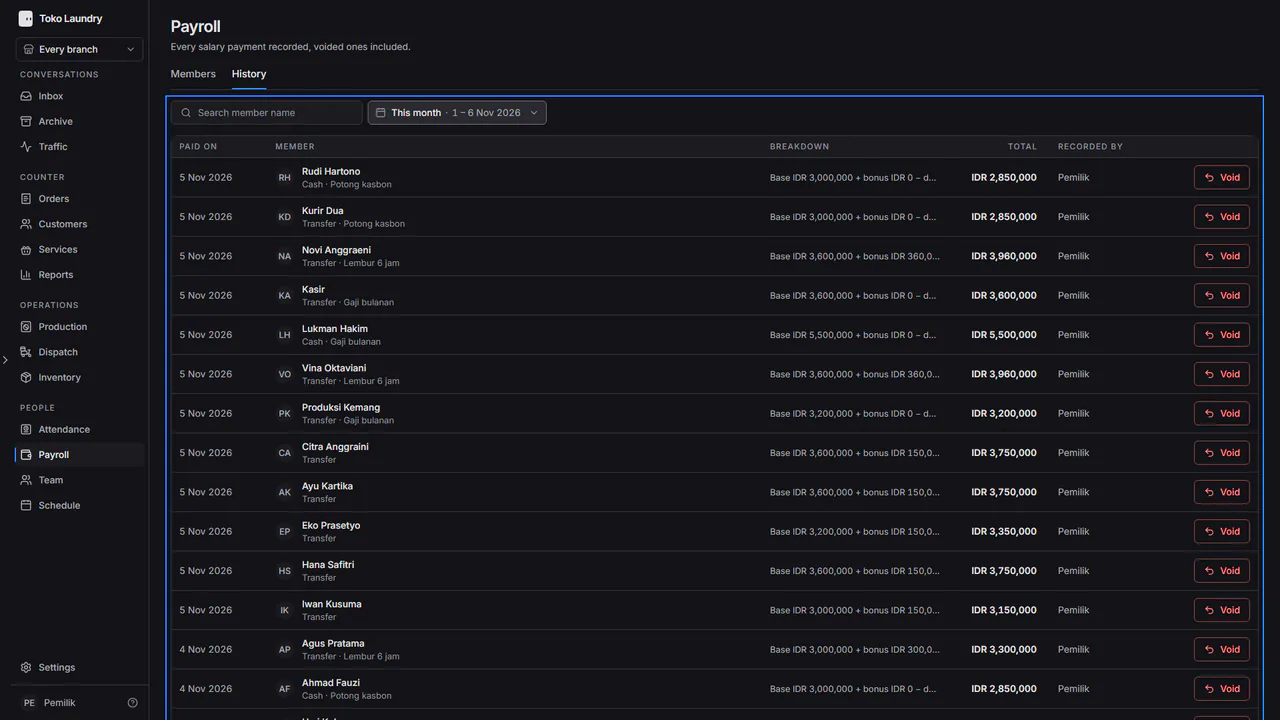
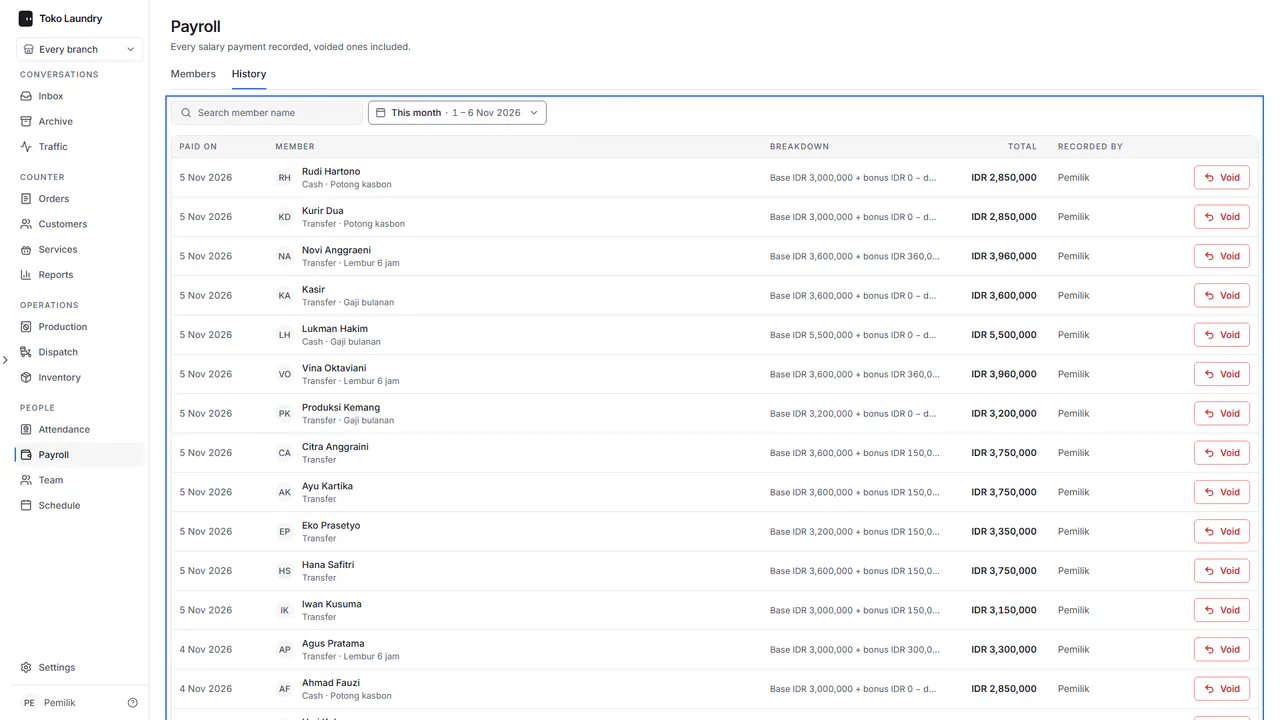
Only the owner sees salaries. Salary payments count as expenses in reports.